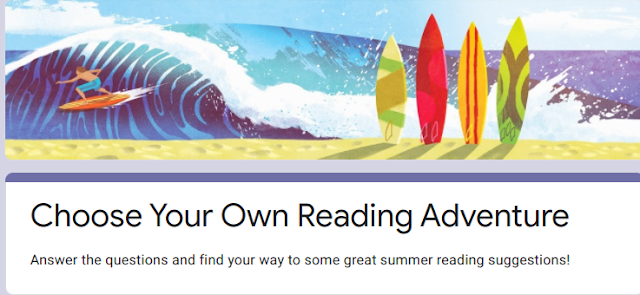
Choose Your Own Summer Reading Adventure!
Normally at this time of year, most of us are preparing summer reading promotions. These, as you may have heard, are not normal times. I know I won't be seeing classes again this school year, so I decided to get busy on a promotion teachers could share during distance learning, and that students could access all summer. Here's what I did (and how I did it!)
First, a little background. Last year I made a Choose Your Own Adventure (CYOA) using Google Forms for teachers who wanted to read some of our library books. I also made a digital magazine using Lucid Press for students. This year I woke up and realized, "Hey, maybe kids who are the target audience for Choose Your Own Adventure books would like an actual CHOOSE YOUR OWN ADVENTURE!" (It took me a year, but I got it! But I'm still including the link to the magazine because I'm pretty proud of how it came out, since I'm not a graphic design person. Honestly, my students don't read magazines at all. If yours do, kudos. But I think they'd still have more fun with a CYOA.)
Using Google Forms to make the CYOA is a great way to go, but not that intuitive, because we need to create those branching choices. Here's how I did it. And since I've already made all the mistakes for you, I'll point out what I'd do to streamline it:)
 |
First, a little background. Last year I made a Choose Your Own Adventure (CYOA) using Google Forms for teachers who wanted to read some of our library books. I also made a digital magazine using Lucid Press for students. This year I woke up and realized, "Hey, maybe kids who are the target audience for Choose Your Own Adventure books would like an actual CHOOSE YOUR OWN ADVENTURE!" (It took me a year, but I got it! But I'm still including the link to the magazine because I'm pretty proud of how it came out, since I'm not a graphic design person. Honestly, my students don't read magazines at all. If yours do, kudos. But I think they'd still have more fun with a CYOA.)
Using Google Forms to make the CYOA is a great way to go, but not that intuitive, because we need to create those branching choices. Here's how I did it. And since I've already made all the mistakes for you, I'll point out what I'd do to streamline it:)
Choose Your Books First!
Don't even bother with the Form until you have created some reading lists. I knew I wanted fiction and nonfiction choices and I wanted to use titles our library owns (I am contemplating a summer checkout. I hope I come to my senses about that soon.)
I have lots of resource lists in Destiny, and we genrefied our fiction section last year, so this part was easy. I made several fiction lists very quickly. I then made a biography list, a "quirky" nonfiction list and one focused on current topics. (Hint: Make a graphic novel/graphic nonfiction list now. I didn't and had to come back later and add one.)
I initially made my lists as Google Docs. Google Docs are great but they're just...docs. After looking at them for a while, I wanted to zhuzh them up. That's where Wakelet came in. I used Goodreads to add the links, which meant each book cover also had a snippet of the book description right underneath. (Hint: Start with Wakelet. Even though it seems like we have nothing but time, use yours wisely. Unlike me.)
 |
| The Google Doc version |
I also copied and pasted every book cover into each Google Doc. Every. Single. Book. I had to line up the little book covers, then minimize my screen so I could capture the image...don't do it. Students aren't going to spend much time on this page, because they have the link to the Wakelet to click on! (Hint: Choose an image for your Wakelet cover, and use the same image on the corresponding section of your Form! Simple, quick and less cluttered.)
Making Your Form
Once you have your lists, it's time to tackle the Form. If you're never made a branching Form, don't despair! The key is to make every section first. In my Form, I have readers choose either fiction, nonfiction or graphic novels. Under fiction and nonfiction, they then make another choice. Each of those choices is a section. You can't link to a section unless the section already exists! (This sounds like one of those corny adages like "put your own life vest on before helping others." Sorry, but it's true.) So, you make your fiction/nonfiction/graphic novel section, then build all the fiction sections, all the nonfiction sections and the graphic novel section. NOW you can create the links between the sections.
Did your eyes glaze over reading the paragraph above? Don't worry! This is much harder to explain in print than it is to do! There are tons of videos on the Web that explain how to make a branching form. This one is short and library related, so take a look. Below are some images from my form that show the sections I created.
Remember, you can move sections, add new sections wherever you want them, etc. For example, if you link section 3 to section 7, then add a new section as section 4, you don't need to change anything! Section 3 will automatically link to the section you linked it to, regardless of the number! (Hint: Name your sections clearly so it's easy to link them, especially when you're adding several sections!)
You'll probably have to keep playing with the Form. My advice is to use your preview option frequently. Run through the entire Form, choosing every option, to make sure each branching choice is correct. Here's a link to my Form. Feel free to make a copy and play with that one. (If you can't make a copy, email me and I'll send it to you!) You can always add different sections that you know your students will enjoy.
I keep reading over my post and feel like I haven't explained this well, but rather than fiddling with it any longer, I'm posting as is! If you have any questions or need any help, please email me, hit me up on Twitter, or comment below and I would be happy to help! Once you get the hang of branching Forms, you'll see all kinds of uses for them in your school library, so it's worth the effort.


Comments
Post a Comment